Shed/Storage Building
One thing I knew our new house needed was a storage building. There is NO WAY to fit everything out of our old 4-car garage into the 2-car garage! The plan is to move enough "yard and outdoor" stuff into the shed that one car can fit into the garage along with my woodworking tools and workbenches.
We (Francie and I) selected the small side yard as the location for the shed. This side yard will also be Teddy's domain once we get it graded for drainage and rocked in (so she will stay clean). We also wanted the shed to be as large as possible for maximum crap storage, so we elected to erect an 8 x 8 building at the front of the area. Since the yard is only 10 ft. 6 in. wide, that leaves just enough room to build the shed (hopefully).
The first step was leveling a pad for the building. I did not want the expense or hassle of a concrete pad (which would have been best), so I settled for compacted crushed gravel. I spent the better part of two days on this part of the plan over a couple of weekends (actually, it was probably only 4 hours or so of actual work).
The shed we purchased was from Costco for $550. It came in 3 LARGE boxes, so I rented a trailer from UHaul to pick it up (before getting the Canyon). With the entire shed kit unboxed into the yard (the only way one person could hope to remove it from the trailer was one piece at a time), a serious snag developed. The neighbors had been running their sprinkler system and there was a LOT of runoff into our yard! At the front where the shed pad was built, water was left standing in pools and soaking the bed of gravel (which became somewhat quicksand-like), so something had to be done. Project on hold!
I decided to dig a shallow, sloped trench between the fence and the pad to direct water away from the shed. The bottom was lined with plastic and filled with gravel. Now water running under the fence SHOULD enter the trench and flow forward under the front fence and away. THEN the shed could be built!
Today (June 26, 2005) I managed to assemble the entire thing by myself in just a couple of hours. It was actually kinda fun. Like a big puzzle or erector set. All of the pieces went together fairly smoothly. The only thing that I am not entirely happy about is the pad. The gravel "crunches" underfoot when walking inside and there are a couple of places where it was obviously not completely flat ("spongy" feel to it). I think it will be OK, though. It started raining just as I finished, so we'll be able to see right away if it leaks! The peak of the roof is a translucent "skylight" and actually does an adequate job of lighting the interior.
Here it is and how it went together:
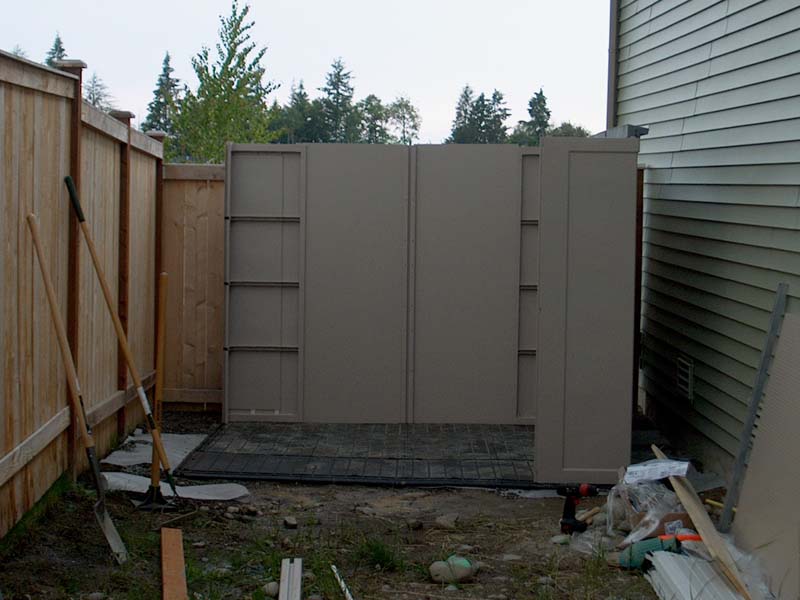
Walls going up--starting at one corner and working around.
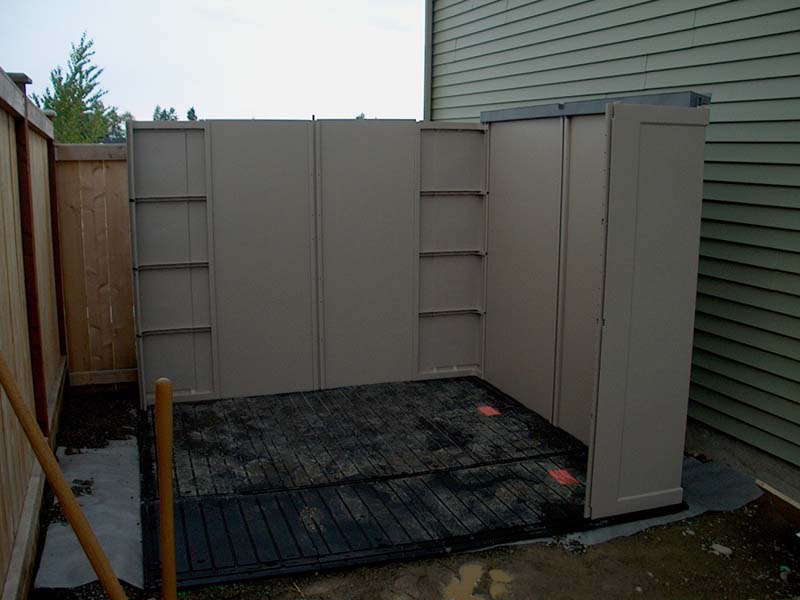

All the walls are up and the doors are in place.
Now the roof framing is installed. This step really stiffened up the building.

Last major construction was the roof. Here you can see the central support beam which acts as a skylight to lighten the interior. The roof is assembled from 8 subpanels.

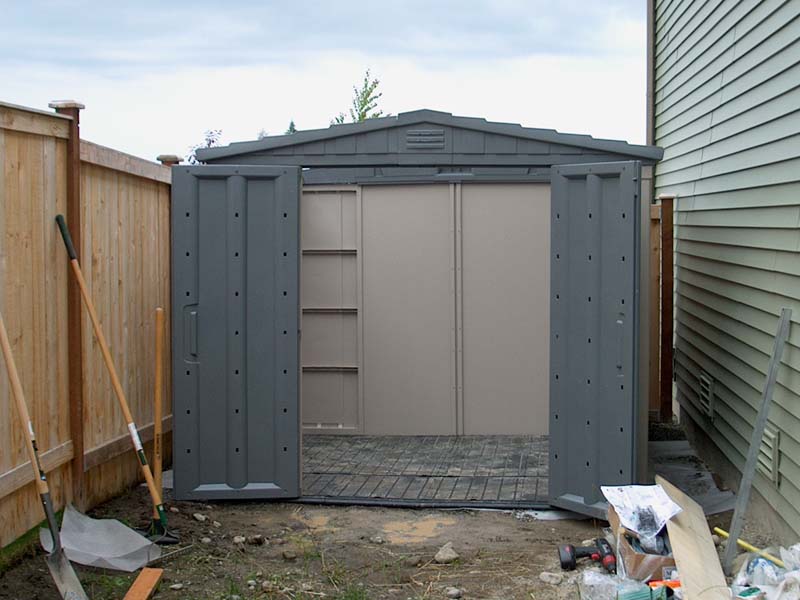
And there it is!
26 June, 2005